
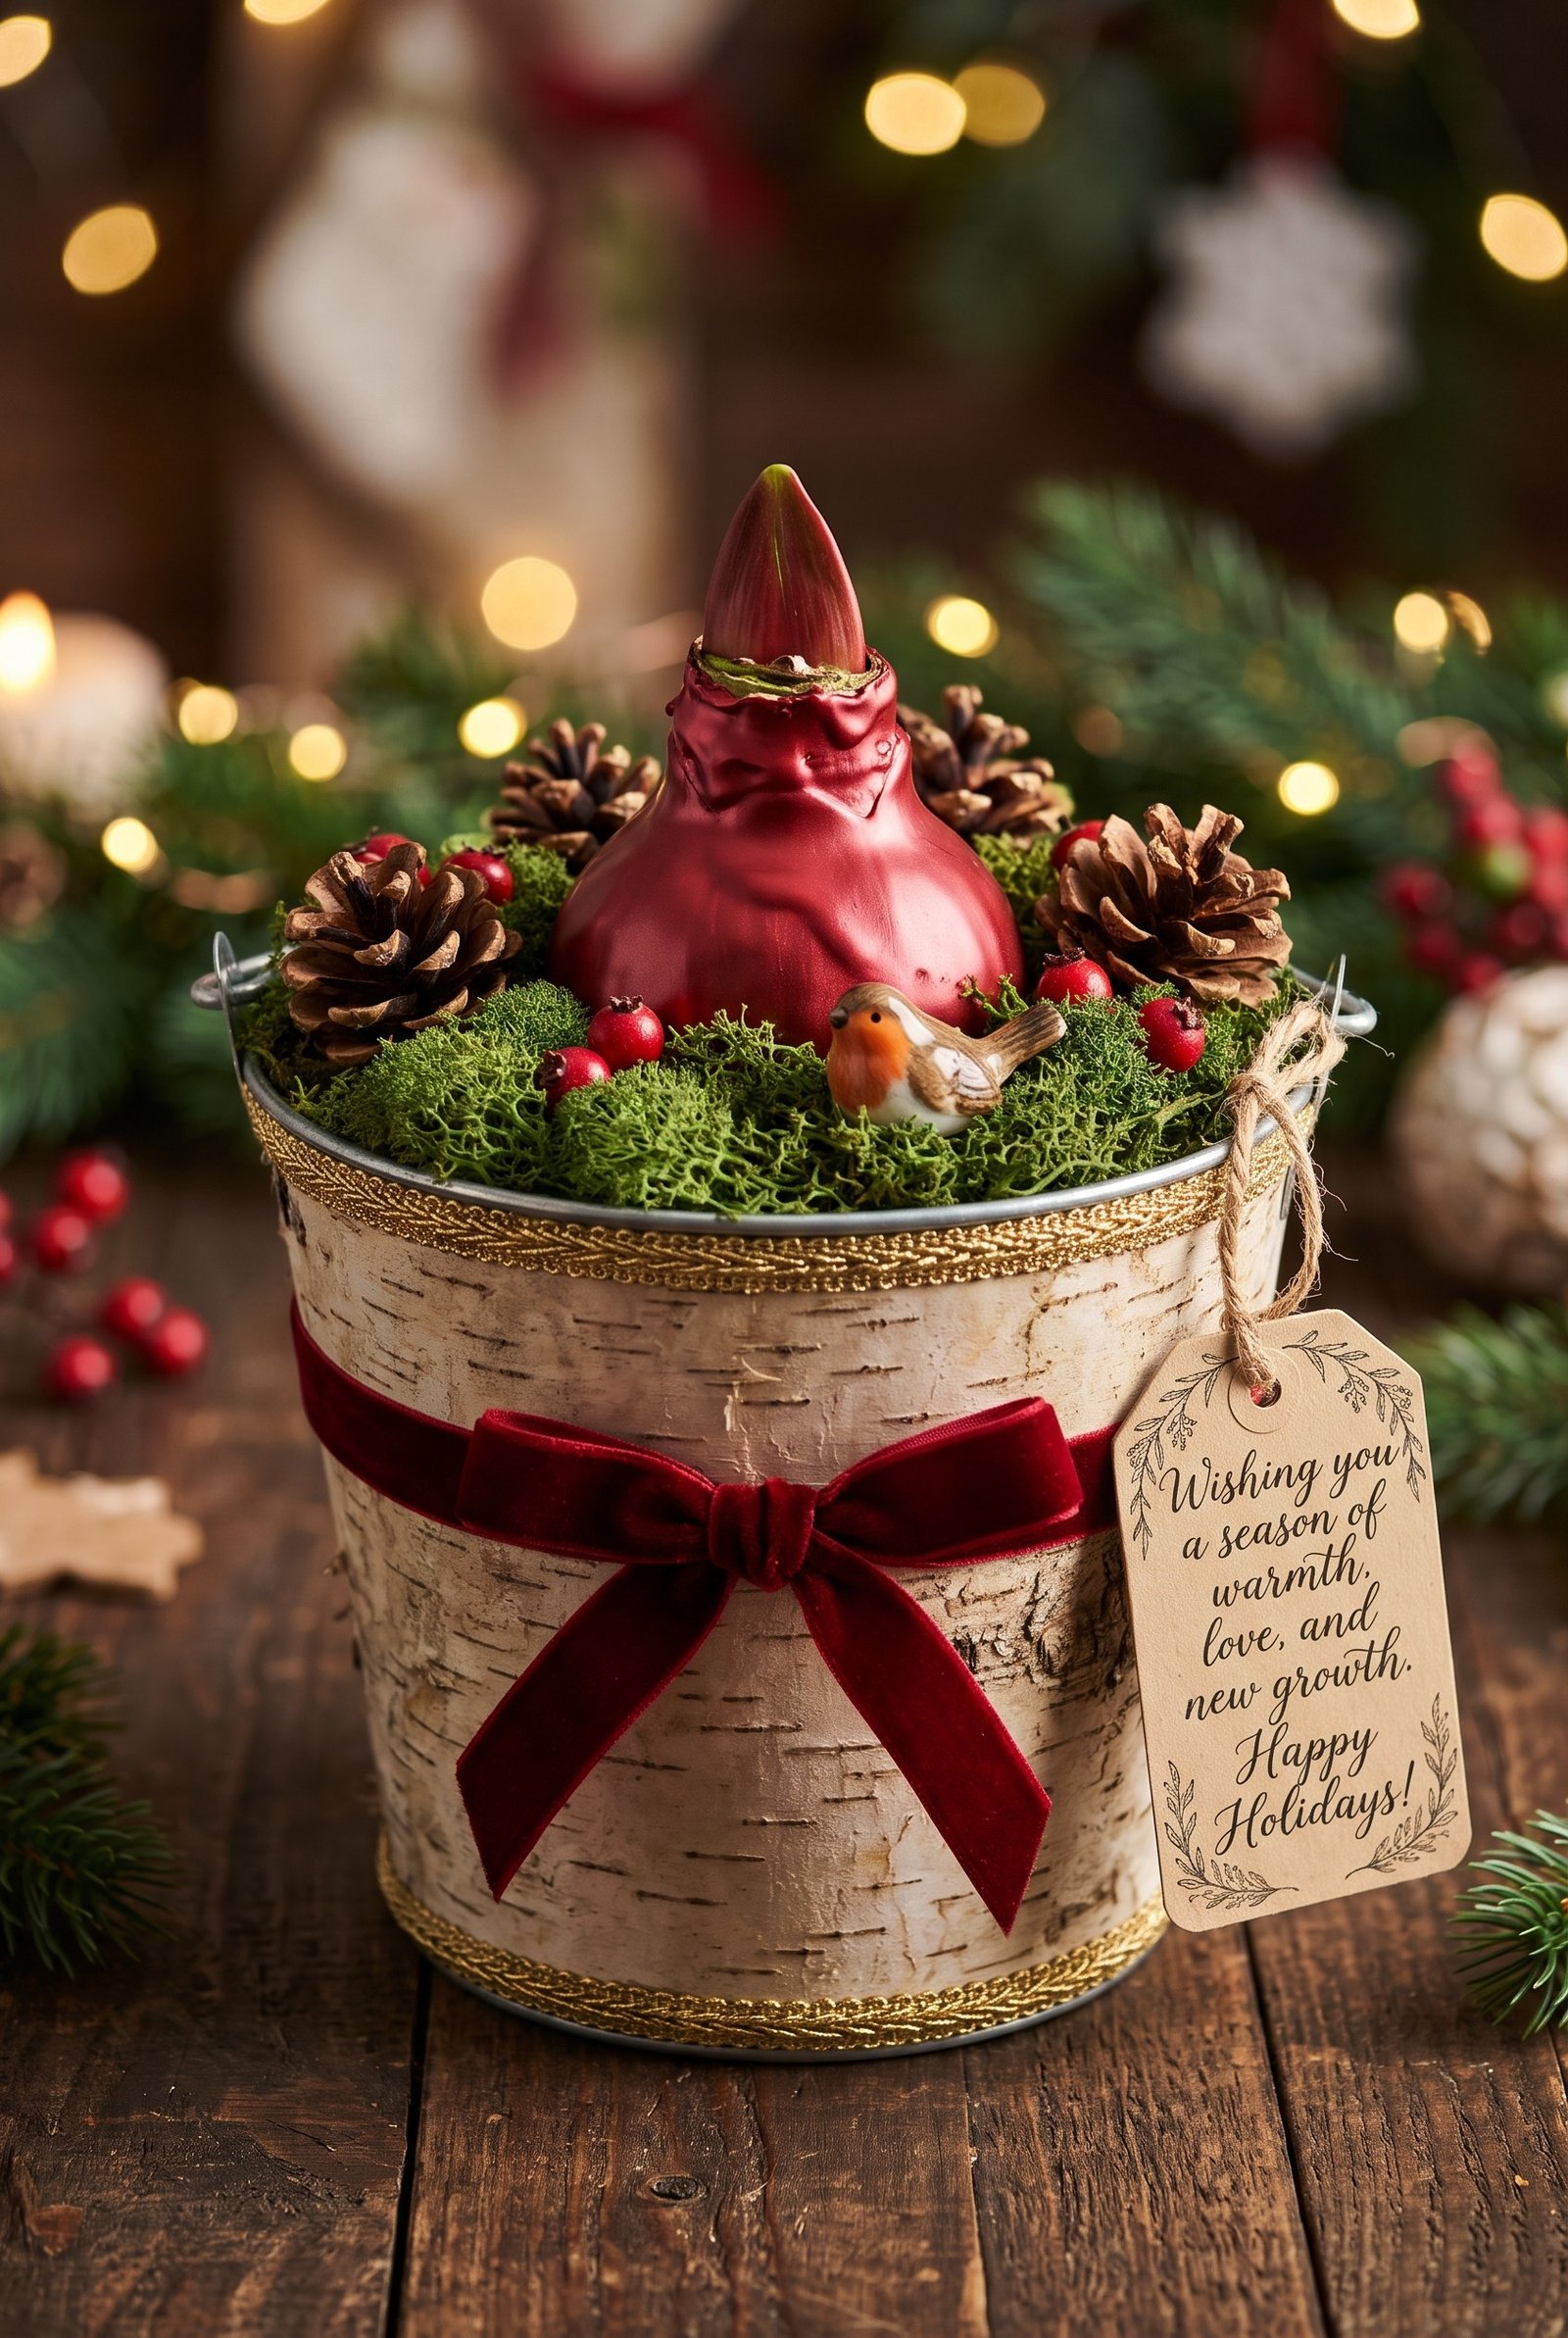
Creating a custom holiday planter does not require advanced crafting skills or expensive materials. Wrap a simple metal bucket in natural birch bark and add festive ribbon and trim to create an elegant indoor plant display that makes a memorable gift for any gardener.
This project features a wax-dipped amaryllis bulb resting on a bed of green sheet moss, surrounded by pinecones, berries, and a ceramic robin figurine. Because wax-dipped amaryllis bulbs bloom without soil or water, this arrangement stays clean and low-maintenance all holiday season.
Project Overview
- Intended Use: Indoor holiday tabletop plant display or customized gift kit.
- Skill Level: Easy (suitable for adult beginners).
- Proposed Dimensions: Fits a standard 6-inch-diameter, 6-inch-tall metal container.
- Key Material Choice: Natural, flexible birch bark sheet paper over a rigid metal container core.
Supplies to Gather
You can find specific supply links for this project on my Benable page.
Required Materials
- Container Core: 1 metal bucket (approximately 6 inches in diameter and 6 inches tall).
- Outer Shell: 1 sheet of natural flexible birch bark veneer (approximately 7 inches by 20 inches).
- Focal Plant: 1 red wax-dipped amaryllis bulb.
- Interior Filler & Top Dressing: Preserved green sheet moss, 4 to 6 small natural pinecones, and 4 to 6 faux red winter berry picks.
- Decorative Ribbons & Trim: 5/8-inch deep red velvet ribbon and 3/8-inch metallic gold braided trim.
- Accents & Tag: 1 small ceramic robin or cardinal figurine, 1 kraft paper gift tag, and natural jute twine.
- Support Base: 1 floral foam block or dense craft foam disk sized to fit inside the bucket.
Required Tools
- Craft hot glue gun and glue sticks.
- Heavy-duty craft scissors.
- Measuring tape.
- Fine-tip black marker or calligraphic pen.
Step-by-Step Assembly Instructions
Step 1: Measure and Cut the Birch Bark Sheet
Wrap your measuring tape around the outside of the metal bucket to determine its circumference and height. Mark your birch bark sheet to match the bucket’s height, adding 1/2 inch to the length so the ends overlap neatly at the back. Carefully trim the bark with heavy-duty craft scissors.
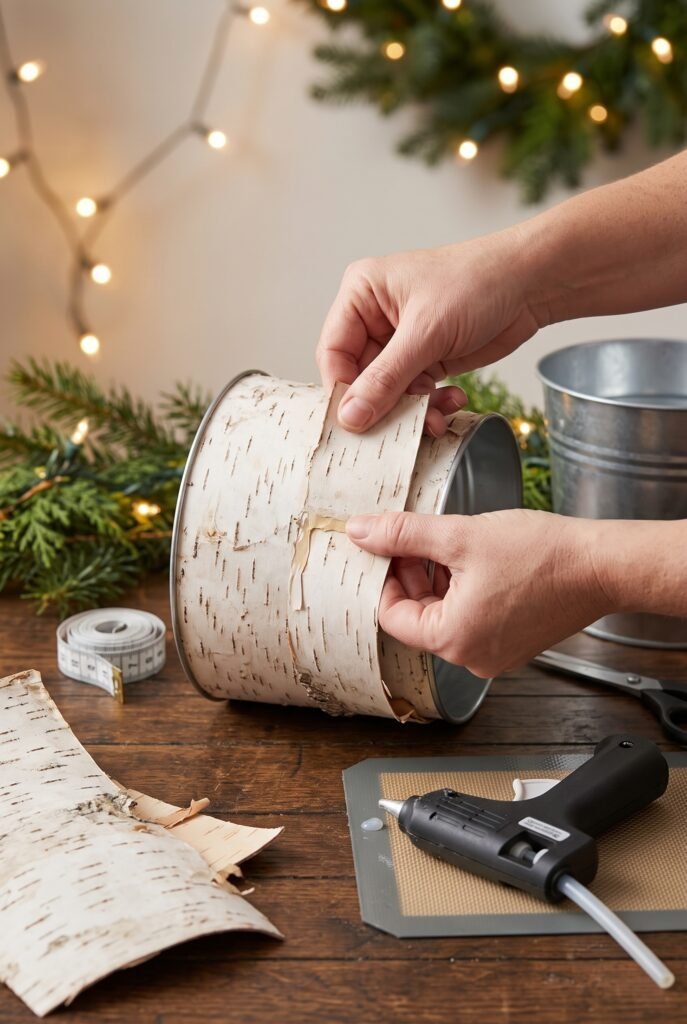
Step 2: Adhere the Birch Bark Shell
Apply vertical lines of hot glue directly onto the outer surface of the metal bucket. Press the cut birch bark firmly onto the adhesive, smoothing it around the container’s curve as you work. Secure the overlapping seam at the back with an extra line of hot glue.
Step 3: Apply the Gold Metallic Rims
Measure and cut two strips of metallic gold braided trim to match the bucket’s top and bottom circumferences. Apply a thin bead of hot glue right along the upper edge of the birch wrap, then press the gold trim into the glue. Repeat this process along the bottom edge.
Step 4: Add the Center Velvet Ribbon and Bow
Wrap the deep red velvet ribbon horizontally around the middle of the birch basket. Secure the ribbon at the back seam with a small dot of glue. Tie a separate red velvet bow and glue it directly onto the center front of the basket.
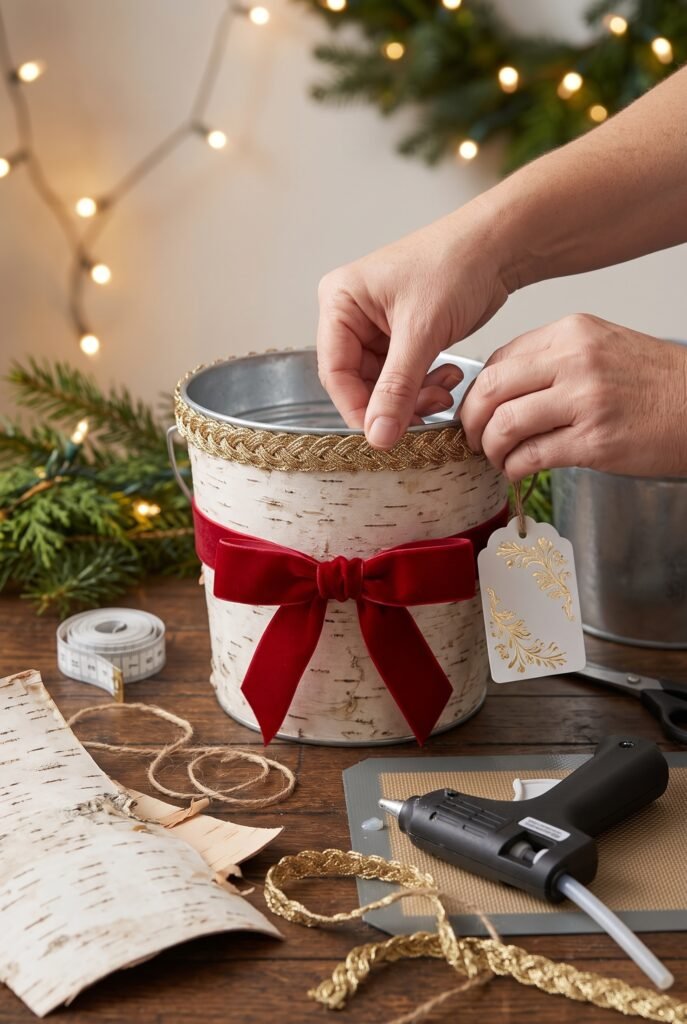
Step 5: Fill the Container Base
Place the floral foam block inside the metal bucket so it sits about 1 inch below the top rim. Cover the top surface of the foam completely with a thick layer of green sheet moss, tucking the outer edges securely around the inside rim of the bucket.
Step 6: Arrange the Plant and Decorative Details
Set the wax-dipped amaryllis bulb into the center of the moss layer so it stands upright. Arrange the natural pinecones and red berry picks around the base of the bulb to cover any exposed gaps. Set the small ceramic robin figurine onto the moss near the front of the display.
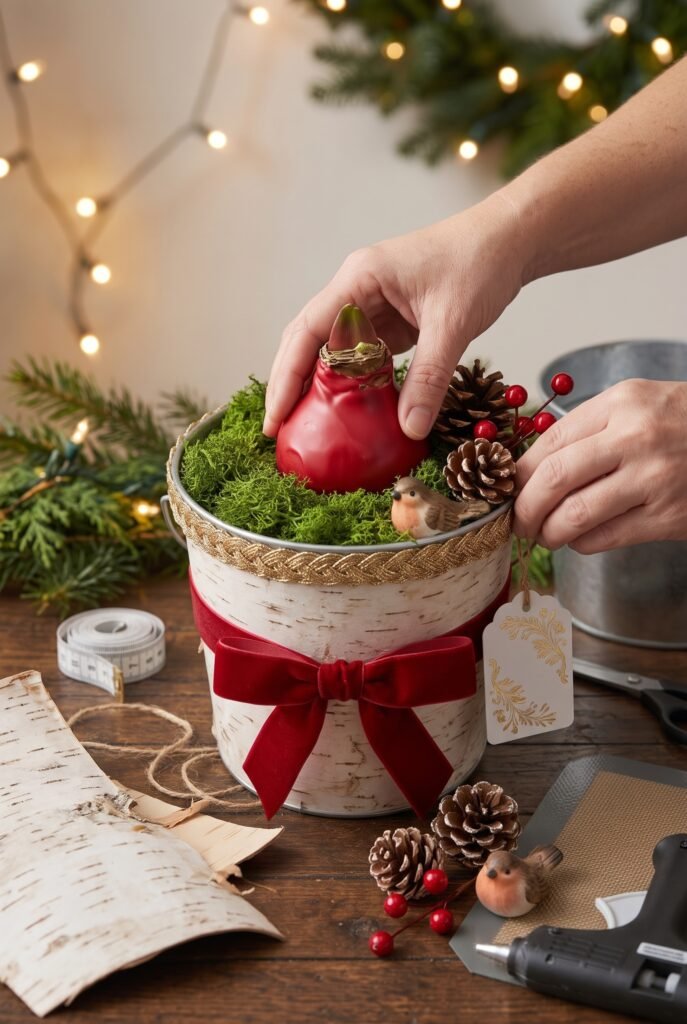
Step 7: Write and Attach the Gift Tag
Write your holiday greeting onto the kraft paper gift tag using a fine-tip pen. Thread a piece of jute twine through the tag’s hole and tie it around the right side of the red velvet bow or container handle anchor.
Practical Adjustments and Care
- Bulb Stability: If the wax-dipped bulb feels top-heavy, press its base gently into the foam layer beneath the moss to create a shallow recess before setting it in place.
- Long-Term Container Use: Since the amaryllis bulb does not require water, the metal bucket and bark wrap stay completely dry. Once the bulb finishes blooming, remove the moss and interior foam so you can reuse the container for other plant displays.
Final Check
Verify that all ribbon ends and metallic trims are securely glued to the bark surface. Confirm that the amaryllis bulb stands straight and that the moss layer fully conceals the foam support inside. Place the finished basket in a bright indoor spot away from direct heat sources to enjoy the upcoming bloom.